Table of Contents
Microsoft Word 2010 Exercise 3
Block Operations: Move, Cut, and Copy
Sometimes it is useful to select whole blocks of text to delete them, copy them, or move them. Or you may wish to change the order of a set of paragraphs. These sorts of operations are called block operations.
Cut and Paste (Move)
To move a block of text from one part of a document to another you will have to perform a cut and paste operation.
- Select the block that you want to move.
- On the Home tab, in the Clipboard group, click Cut (shortcut:
Ctrl+X). This will transfer the content you selected to the clipboard, removing it from the document. - Move the cursor to the point in your document where you want the content to appear.
- On the Home tab, in the Clipboard group, click Paste (shortcut:
Ctrl+V). This will transfer content from the clipboard into your document at the cursor location.- Note the various options available for pasting in both the drop-down menu and and the popup mini-toolbar. These offer you control over the degree of formatting to maintain in the pasted text.
Copy and Paste
To copy a block of text from one part of a document to another you will perform a copy and paste operation.
- Select the block that you want to copy.
- On the Home tab, in the Clipboard group, click Copy (shortcut:
Ctrl+C). This will place a copy of what you selected onto the clipboard. - Move the cursor to the point in your document where you want the copied content to appear.
- On the Home tab, in the Clipboard group, click Paste (shortcut:
Ctrl+V). This will transfer content form the clipboard into your document at the cursor location.- Note the various options available for pasting in both the drop-down menu and and the popup mini-toolbar. These offer you control over the degree of formatting to maintain in the pasted text.
Using Graphics
Microsoft Word 2010 lets you incorporate graphics from a variety of sources in your documents. These sources include clip art and pictures from the Web or stored on your hard drive.
Inserting Clip Art
Microsoft Word 2010 provides a library of generic drawings that can be inserted into documents. The generic term used to identify these type of drawings is clip art.
Inserting clip art into a document
- On the Insert tab, in the Illustrations group, click Clip Art.
- Click the Clip Art task pane. The Search for: textbox will open. In the Search for: text box, type a word or phrase that describes the clip art that you want, or type in all or some of the file name of the clip art. To narrow your search, do any of the following:
- To limit the search results to a specific collection of clip art, in the Search for: textbox, click the arrow and select the collection you want to search.
- To limit the search results to clip art, click the arrow in the Results should be box and select the check box that correspond to the type of clip art you are looking for.
- By default, Microsoft Office 2010 also includes photographs, movies, and sounds in clip art search results.
- Click Go.
- In the list of results, click the desired clip art to insert it into the document at the cursor location.
- Alternately you can copy the clip art to the clipboard using the dropdown menu next to the art and paste it wherever desired later.
Resizing Images
You can resize images in your document by clicking on the image to select it and then dragging any of the handles. To resize proportionately, hold down Ctrl while you drag a corner handle.
Moving Images
To move an image, you can either
- Select the image and use the Cut and Paste commands.
- Hover over the image, hold down the left mouse button, and drag the mouse.
Formatting Images
Additional formatting options are available in the dynamic Picture Tools tab that appears when you select clip art (and other graphics) in the document. Pay particular attention to options:
- In the Picture Styles group
- In the Position and Wrap menus
Inserting Other Images
Microsoft Word 2010 lets you to insert pictures and other images from a variety of sources in your documents.
Inserting pictures and images from Web pages
There are many Websites that offer images and other graphics that you can insert into your documents.1) To insert an image from a Web page:
- Open the Microsoft Office Word 2010 document.
- Launch your Web browser and open the Web page with the image you want to insert.
- From the Web page, copy the picture that you want to insert to the clipboard.
- Many browsers let you do this by right clicking on an image and selecting an appropriate menu item from the menu that appears.
- Return to Microsoft Word, place the cursor where you want the image to appear, and do a paste operation.
Inserting images from a file
- Click where you want to insert the picture.
- On the Insert tab, in the Illustrations group, click Picture.
- Locate the picture that you want to insert.
- Double-click the picture that you want to insert.
Undoing / Redoing Editing Operations
Many operations can be reversed with the Undo and Redo commands.
- To undo the most recent operation, click the Undo icon
 (shortcut:
 Ctrl+Z) on the Quick Access Toolbar. - To redo an operation that you previously undid, click the Redo icon
 (shortcut:
 Ctrl+Y) on the Quick Access Toolbar.
Find and Replace
Find
You can search for every occurrence of a specific word or phrase.
- On the Home tab, in the Editing group, click Find.
- In the Navigation task pane, type the text you want to search for in the topmost textbox. All instances of the text will be highlighted in the document.
- To navigate to the next/previous instance:
- Clicking the down/up arrows in the Navigation task pane; or
- Click the rightmost tab in the Navigation task pane and select the document fragment showing the desired instance.
You can also perform a dialog-based search using by clicking the menu arrow next to Find (on the Home tab, in the Editing group) and selecting “Advanced Find…”
Find and replace
You can automatically replace a word or phrase in a document with another—for example, you can replace the text Acme with the text Apex.
- On the Home tab, in the Editing group, click Replace.
- In the dialog box that appears, make sure the Replace tab is selected.
- In the Find what: box, type the text that you want to search for.
- In the Replace with: box, type the replacement text.
- Do one of the following:
- To find the next occurrence of the text, click Find Next.
- To replace an occurrence of the text, click Replace. After you click Replace, Office Word 2010 moves to the next occurrence of the text.
- To replace all occurrences of the text, click Replace All.
Note: To cancel a replacement in progress, press ESC.
Note: The replacement text will use the same capitalization as the text that it replaces. For example, if Find what: is AKA and Replace with: is Also known as, the resulting replaced text will be ALSO KNOWN AS.
Paragraph Indentation
Indentation determines the distance of the paragraph from either the left or the right margin. Within the margins, you can increase or decrease the indentation of a paragraph or group of paragraphs.
You can also create a negative indent (also known as an outdent), which pulls the paragraph out toward the left margin.
You can also create a hanging indent, in which the first line of the paragraph is not indented, but subsequent lines are.
Increase or decrease the left indent of an entire paragraph
- Select the paragraph that you want to change (or place the cursor anywhere in the paragraph)
- On the Page Layout tab, in the Paragraph group, click the Paragraph Dialog icon
- In the resulting dialog's Indentation section, click the arrows next to the Left spinner to increase or decrease the left indentation of the paragraph.
Increase or decrease the right indent of an entire paragraph
- Select the paragraph that you want to change (or place the cursor anywhere in the paragraph)
- On the Page Layout tab, in the Paragraph group, click the Paragraph Dialog icon
- In the resulting dialog's Indentation section, click the arrows next to the Right spinner to increase or decrease the right indentation of the paragraph.
Indent only the first line of a paragraph
- Select the paragraph that you want to change (or place the cursor anywhere in the paragraph)
- On the Page Layout tab, click the Paragraph Dialog Box Launcher, and then click the Indents and Spacing tab.
- In the Special list under Indentation, select First line
- In the By box, set the amount of space that you want the first line to be indented
Create a hanging indent
- Select the paragraph that you want to change (or place the cursor anywhere in the paragraph)
- On the Page Layout tab, in the Paragraph group, click the Paragraph Dialog icon
- In the Special list under Indentation, click Hanging, and then in the By box, set the amount of space that you want for the hanging indent.
Negative indent
- Select the paragraph that you want to change (or place the cursor anywhere in the paragraph)
- On the Page Layout tab, in the Paragraph group, click the Paragraph Dialog icon
- In the resulting dialog's Indentation section, click the down arrow next to the Left or Right spinner to decrease the left or right indentation until it is a negative number.
Footnotes and Endnotes
Footnotes are notes that appear at the bottom of the page while endnotes appear at the end of the text body. Each note corresponds to a number or symbol that appears in the body of the document.
Footnotes and Endnotes are typically used in academic writing to indicate attributions (references) and to make clarifying and/or parenthetical remarks.
To add a footnote or endnote to the document you are working on:
- Position the cursor at the point in your text where you want to insert the note.
- On the References tab, in the Footnotes group, click Insert Footnote or Insert Endnote.
- Enter the content of the note.
- Double-click the footnote or endnote number to return to the reference mark in the document.
To change the numbering format of footnotes or endnotes
- Click the Footnotes dialog box launcher
- In the Number format box, select the format that you want
- Click the Apply button
To use a custom mark instead of a traditional number format
- Click the Symbol button next to the Custom mark box
- Choose a mark from the available symbols
- Click the Insert button
Note that Word will automatically update numbers and placement of your footnotes and endnotes if you add or remove notes or move the associated text.
Spell Check
Word has a built-in spelling checker that by default will underline words that might be misspelled with a red wavy line. (A green wavy line indicates a possible grammar issue.)
Applying spelling corrections in-place
To apply Word's selected corrections for text flagged by Word's spell check (i.e., terms underlined with a red wavy line):
- Right click on the term
- Browse the list of suggested corrections in bold at the top of the resulting popup menu
- Apply the desired correction by clicking on it.
If the desired correction is not in the list, manually type the correct text over the erroneous text.
Checking spelling interactively
You can open a dialog box that will ask you to correct or confirm the spelling for flagged words one by one. Do this by clicking on the the Spelling & Grammar icon in the Proofing group of the Review tab.
Setting the spell check language
You can set the language for the spell checker by clicking on the Set Language icon in the the Proofing group of the Review tab. In the dialog box that appears, select the language for the selected text and click OK. You can set the default language used by Word's spell checker by clicking the Default… button.
AutoCorrect
Microsoft Word 2010 will automatically correct small errors as you type. For example, if you type “teh”, Word will automatically correct this to “the”. This feature is called AutoCorrect and uses the same language setting as Spell Check.
To change the settings for AutoCorrect:
- Go to File tab > Options > Proofing
- Click the AutoCorrect Options button
- Make the desired changes and click Ok.
Word Practice: Formatting, Footnotes, and Graphics
In this exercise, you will create the document shown here.2)
- Open a new document in Microsoft Word 2010 using the Blank Template.
- Open the page pablo_picasso.txt, then copy and paste the text into your Word document.
- Note: The document will almost certainly not open in Microsoft Word 2010. You will have to do a copy/paste between applications.
- When you paste the text into your Word document use the Merge Formatting (M) paste option. You should do this whenever you copy/paste text in this exercise.
- Exchange the positions of the last and second-to-last paragraphs using cut and paste.
- At the very top of the document, start a new paragraph and add the text:
Pablo Picasso (1881 - 1973): Artist - Use Styles to make the text you just added a Title.
- Between the title and the main body, add a new paragraph with the text
"It takes a long time to become young" (Pablo Picasso) - If necessary, use Styles to make the text you just added Normal.
- Set the quotation you just added (including the quotation marks) in italic.
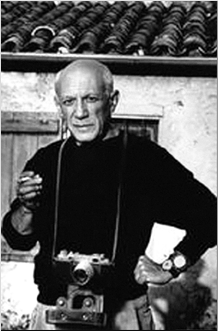
- At the start of main body text, insert this picture.3)
- Set the main body's text in Times New Roman typeface and 11 point size.
- Set all of the quotation's text in Cambria typeface and 9 point size.
- Make the text “Pablo Picasso” at the start of the main body's first paragraph bold.
- Use Find & Replace to replace all instances of “Picasso” in the main body with “Pablo”—except the first one.
- Use Spell Check to correct spelling mistakes. (Note: none of the proper nouns are misspelled.)
- Add a footnote for George Braque with the text:
"Georges Braque." Mark Harden's Artchive. http://www.artchive.com/artchive/B/braque.html (accessed September 19, 2012).- Note: Type in the footnote text. Do not copy/paste it.
- Add a footnote for cubism with the text:
An early proponent of cubism was painter Charles-Édouard Jeanneret, who would later be known as the architect Le Corbusier.- Note: Type in the footnote text. Do not copy/paste it.
- Add a header with the course name, your first and last name, and your ID number.
- Add a footer with the current time and date.
- Adjust the size of the photograph so that the entire document fits on one page.
Print out and hand in your document to the instructor.