android_learning:headfirst_android_development_notes:chapter_7
Table of Contents
Chapter 7
There's a lot of new stuff in this chapter, so you may want to set aside extra time.
p. 274: Project setup
When you create the project make sure to change the minimum SDK setting to API 17 or higher. It's easy to miss in the book.
Now is also be a good time to create a new AVD for a tablet. I went with a Nexus 9, API 23, x86.
Finally, in MainActivity.java, if the MainActivty class extends android.support.v7.app.AppCompatActivity, change it so it extends android.app.Activity instead. If you fail to do so, things will break around p. 302 when working with the back stack. Note that you will have to make two changes: one to change the extends class and the other to the import statement.
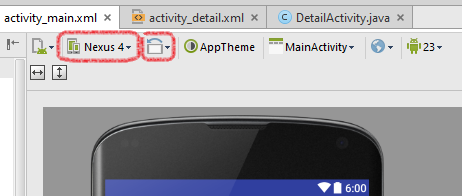
In an Android Studio's Design view, you can switch between various devices and orientations using the toolbar at the top of the frame.
p. 275: Code block
- Workout.java
package com.hfad.workout;

public class Workout {
    private String name;
    private String description;
    public static final Workout[] workouts = {
            new Workout("The Limb Loosener",
                    "5 Handstand push-ups\n10 1-legged squats\n15 Pull-ups"),
            new Workout("Core Agony",
                    "100 Pull-ups\n100 Push-ups\n100 Sit-ups\n100 Squats"),
            new Workout("The Wimp Special",
                    "5 Pull-ups\n10 Push-ups\n15 Squats"),
            new Workout("Strength and Length",
                    "500 meter run\n21 x 1.5 pood kettleball swing\n21 x pull-ups")
    };

    //Each Workout has a name and description
    private Workout(String name, String description) {
        this.name = name;
        this.description = description;
    }

    public String getDescription() {
        return description;
    }

    public String getName() {
        return name;
    }

    public String toString() {
        return this.name;
    }
}
pp. 277-278
When creating the WorkoutDetailsFragment, make sure you specify com.hfad.workout for the package; sometimes the wizard will default to layout instead of the app's package.
The layout code generated by Android Studio for the Fragment produces a FrameLayout. Be sure to change this to a vertical LinearLayout when modifying the code.
You may want to set the TextViews' text to some mock strings rather than an empty string for now so you can see that your Fragment is being rendered correctly before making it show the actual content.
You'll also notice that the WorkoutDetailsFragment.java code in the book uses
import android.app.Fragment
whereas the generated code uses
import android.support.v4.app.Fragment
The generated code also inserts:
    public WorkoutDetailFragment() {
        // Required empty public constructor
    }
You should change your code to use import android.app.Fragment and include the empty public constructor.
p. 290
Change the Fragment import statement in WorkoutListFragment.java to
import android.app.Fragment;
and leave the
public WorkoutListFragment()
definition in place.
p. 292: A matter of style
I find the book's way of creating an ArrayAdapter and then passing it to the setListAdapter() method a little cumbersome. This is a situation where anonymous objects are your friend:
        ...
        setListAdapter(new ArrayAdapter<String>(
                inflater.getContext(),
                android.R.layout.simple_list_item_1,
                names
        ));
        ...
p. 294
If you use the UI builder to drop a new Fragment onto the layout, Android Studio may modify the layout to include a android:weightSum attribute. This will interact with the android:layout_weight attributes you set for the Fragments. Either remove it or make sure everything tallies up.
p. 297
Inner interfaces
WorkoutListListener.java defines the WorkoutListListener interface as an inner interface (i.e., an interface defined inside a class). You may not have seen inner interfaces before. This example works just fine if you define the interface outside the class instead:
- WorkoutListListener.java
/**
 * Event listener interface for the WorkoutList fragment.
 *
 * Created by Mithat on 2/7/2016.
 */
package com.hfad.workout;

public interface WorkoutListListener {
    void itemClicked(long id);
}
To create an interface file in Android Studio, click on New > Java class. If you are asked to specify where to create the new file select the desired option. Then in the Create New Class dialog, select Interface from the dropdown list, fill in the name for the interface, and click OK.
"References" to interfaces
You also may not have seen “references” to interfaces as seen in the statement:
private WorkoutListListener listener;
in WorkoutListFragment.java.
A post on Stack Overflow1) does a good job of explaining “references” to interfaces. In particular, given interface:
public interface Link {
    void mySamplemethod();
    String myString ="HELLO!";
}
and the following variable declaration:
Link b;
then:
bis a variable of typeLinkthat has no value, not evennull. In order to have a practical purpose you must initialize it with an object reference whose class implementsLinkinterface.
Hence,
private WorkoutListListener listener;
and
this.listener = (WorkoutListListener) activity;
In other words, the listener variable and onAttach methods set up a link from the WorkoutListView to its parent Activity's event listening stuff.
onAttach(Activity activity) is deprecated
When you add the code above to your project, the onAttach(Activity activity) method may appear struck through. This is because onAttach(Activity activity) was recently deprecated in favor of onAttach(Context context).2)
I suggest sticking with the deprecated code from the book for now as it seems the change to onAttach(Context context) is still a bit unsettled.
Code block (modified)
Here is my version of WorkoutListFragment.java that assumes WoroutListListener is defined in its own file:
- WorkoutListFragment.java
package com.hfad.workout;


import android.app.Activity;
import android.app.ListFragment;
import android.content.Context;
import android.os.Bundle;
import android.app.Fragment;
import android.view.LayoutInflater;
import android.view.View;
import android.view.ViewGroup;
import android.widget.ArrayAdapter;
import android.widget.ListView;

/**
 * A simple {@link Fragment} subclass.
 */
public class WorkoutListFragment extends ListFragment {

    private WorkoutListListener listener;

    public WorkoutListFragment() {
        // Required empty public constructor
    }

    @Override
    public View onCreateView(LayoutInflater inflater, ViewGroup container,
                             Bundle savedInstanceState) {
        String[] names = new String[Workout.workouts.length];
        for (int i = 0; i < names.length; i++) {
            names[i] = Workout.workouts[i].getName();
        }

        setListAdapter(new ArrayAdapter<String>(
                inflater.getContext(),
                android.R.layout.simple_list_item_1,
                names
        ));

        return super.onCreateView(inflater, container, savedInstanceState);
    }

    /**
     * Bind an activity to this WorkoutListFragment.
     *
     * Set this WorkoutListFragment's listener to the activity. Activity must
     * implement WorkoutListListener.
     *
     * @param activity Activity to bind to this WorkoutListFragment
     */
    @Override
    public void onAttach(Activity activity) {
        super.onAttach(activity);
        this.listener = (WorkoutListListener) activity;
    }

    /**
     * Forward click events to this WorkoutListFragment's listener.
     *
     * @param l
     * @param v
     * @param position
     * @param id
     */
    @Override
    public void onListItemClick(ListView l, View v, int position, long id) {
        super.onListItemClick(l, v, position, id);
        if (listener != null) {
            listener.itemClicked(id);
        }
    }
}
p. 298
Want to make sure that things are working as expected at this point? Toast!
@Override
public void itemClicked(long id) {
    Toast.makeText(MainActivity.this, "Item id: " + id, Toast.LENGTH_SHORT).show();
}
Note: Android does have a proper console where development and debug messages can be sent. It will be covered later.
p. 299
Before implementing the updating of workout details the right way, it might be instructive to look at how to do it the wrong way.
The easiest way to have the workout details fragment show info about workout the user clicked on in the list is to
- In
MainActivity.itemClicked(), set the detail fragment'sworkoutIdto reflect the id the user clicked on:@Override public void itemClicked(long id) { // The wrong way to do it: // 1. Get the details fragment and set its workoutId: WorkoutDetailFragment frag = (WorkoutDetailFragment) getFragmentManager().findFragmentById(R.id.detail_frag); frag.setWorkoutId(id); }
- In
WorkoutDetailFragment.setWorkoutId()method, update the detail views to reflect the newworkoutId:public void setWorkoutId(long id) { this.workoutId = id; // The wrong way to do it: // 2. Update the views to reflect the new ''workoutId'': View view = getView(); if (view != null) { // Cache the stuff we'll need: TextView title = (TextView) view.findViewById(R.id.textTitle); TextView description = (TextView) view.findViewById(R.id.textDescription); Workout workout = Workout.workouts[(int) workoutId]; // Update the Views' content: title.setText(workout.getName()); description.setText(workout.getDescription()); } }
This seems perfectly sensible, and if you run it it seems to work fine. But if you try to click the “back” button, you have problems.
The user's expected behavior is for the back button to show the previously selected details. But the back button's default behavior is to show the previous Activity or the home screen if there is none—and fragments are not activities. Thus, the need to push fragment changes onto the back stack using format transactions.
p. 302: Code block
Here's MainActivity.java but loaded up with comments to explain the fragment transaction stuff:
- MainActivity.java
package com.hfad.workout;

import android.app.FragmentTransaction;
import android.app.Activity;
import android.os.Bundle;
import android.widget.Toast;

public class MainActivity extends Activity implements WorkoutListListener {

    @Override
    protected void onCreate(Bundle savedInstanceState) {
        super.onCreate(savedInstanceState);
        setContentView(R.layout.activity_main);
    }

    @Override
    public void itemClicked(long id) {
        // Create a new WorkoutDetailFragment to replace the previous one.
        WorkoutDetailFragment details = new WorkoutDetailFragment();

        // Set the new fragment's properties.
        details.setWorkoutId(id);

        // Call up the fragment manager to start a new transaction.
        FragmentTransaction ft = getFragmentManager().beginTransaction();

        // Specify the transactions you want to perform:
        //   replace whatever is in the fragment container with the new fragment
        ft.replace(R.id.fragment_container, details);

        // Add this transaction to the back stack so that user can navigate with back button
        // (null means no label assigned to this transaction -- 99% of the time you won't need
        // a label)
        ft.addToBackStack(null);

        // Specify a visual transition style to use between old and new fragments
        ft.setTransition(FragmentTransaction.TRANSIT_FRAGMENT_FADE);

        // Do it!
        ft.commit();
    }
}
Try commenting out ft.addToBackStack(null);. What changes?
All those ft.{something} statements can get a bit verbose. Many FragmentTransaction methods support chaining, meaning you can “chain” calls as in the following:
@Override
    public void itemClicked(long id) {
        // Create a new WorkoutDetailFragment to replace the previous one.
        WorkoutDetailFragment details = new WorkoutDetailFragment();

        // Set the new fragment's properties.
        details.setWorkoutId(id);

        // Call up the fragment manager and do a new transaction.
        getFragmentManager().beginTransaction()
                .replace(R.id.fragment_container, details)
                .addToBackStack(null)
                .setTransition(FragmentTransaction.TRANSIT_FRAGMENT_FADE)
                .commit();
    }
p. 304
My emulated tablet behaves oddly when started in landscape mode and then rotated to portrait mode. It seems to work as expected if started in portrait mode and then rotated.
p 316
If you try to run the app on a phone-sized device or emulator at this point, it will crash when you click on one of the activities. Can you explain why? (The answer should be clear after you examine the code on p. 321.)
p. 319: Code block
Note that DetailActivity extends Activity rather than AppCompatActivity.
- DetailActivity.java
package com.hfad.workout;

import android.app.Activity;
import android.os.Bundle;

public class DetailActivity extends Activity {
    public static final String EXTRA_WORKOUT_ID = "id";

    @Override
    protected void onCreate(Bundle savedInstanceState) {
        super.onCreate(savedInstanceState);
        setContentView(R.layout.activity_detail);
        WorkoutDetailFragment workoutDetailFragment = (WorkoutDetailFragment)
                getFragmentManager().findFragmentById(R.id.detail_frag);
        int workoutId = (int) getIntent().getExtras().get(EXTRA_WORKOUT_ID);
        workoutDetailFragment.setWorkoutId(workoutId);
    }
}
p. 321
Here's the MainActivity code with some comments thrown in and some code that's not needed taken out.
- MainActivity.java
package com.hfad.workout;

import android.app.FragmentTransaction;
import android.app.Activity;
import android.content.Intent;
import android.os.Bundle;

public class MainActivity extends Activity implements WorkoutListListener {

    @Override
    protected void onCreate(Bundle savedInstanceState) {
        super.onCreate(savedInstanceState);
        setContentView(R.layout.activity_main);
    }

    @Override
    public void itemClicked(long id) {
        // Check to see if we have a fragment_container
        // ... if we do, then we're on a large screen.
        if (findViewById(R.id.fragment_container) != null) {
            // Create a new WorkoutDetailFragment to replace the previous one.
            WorkoutDetailFragment details = new WorkoutDetailFragment();

            // Set the new fragment's properties.
            details.setWorkoutId(id);

            // Call up the fragment manager and do a new transaction.
            getFragmentManager().beginTransaction()
                    .replace(R.id.fragment_container, details)
                    .addToBackStack(null)
                    .setTransition(FragmentTransaction.TRANSIT_FRAGMENT_FADE)
                    .commit();
        }
        else {
            // Create an intent to launch a DetailActivity
            Intent intent = new Intent(this, DetailActivity.class);
            intent.putExtra(DetailActivity.EXTRA_WORKOUT_ID, (int) id);
            startActivity(intent);
        }
    }
}
1)
“Java: Interface reference?” http://stackoverflow.com/questions/22847942/java-interface-reference. Accessed 2015-02-07.
2)
“Android Fragment onAttach() deprecated.” http://stackoverflow.com/questions/32083053/android-fragment-onattach-deprecated. Accessed 2015-02-07
android_learning/headfirst_android_development_notes/chapter_7.txt · Last modified: 2016/02/21 03:33 by mithat