Table of Contents
Quick Guide to Using KiCad for SPICE Simulation
The following was written for KiCad 4. Simulation support in KiCad 5 has been reworked to such an extent that a lot of the following doesn't work.
If you have KiCad 4 SPICE stuff you'd like to use in KiCad 5, have a look here.
This is written up assuming you know the basics of using KiCad already.
What you'll need
You'll need the following to get a working SPICE setup:
- A SPICE engine:
- ngspice: Arguably the most FOSSy commonly available SPICE engine.
- gnucap: Not actually SPICE but tries to be syntax-compatible.
- SpiceOpus: Proprietary but nice, especially the output plotting.
- PSpice: Windows-only, expensive, defacto standard professional solution in the USA. They also have a tradition of making available a gratis crippleware student version. And introducing non-standard model features, leading to an annoying situation where vendor-supplied models only work in PSPICE. Also has a a GUI, so … ?
- Any others?
- Component libraries with SPICE symbols:
- There is a library of basic SPICE components that ships with KiCad. It's good enough for initial experimentation. The library isn't included in Eeschema projects by default. You'll have to add it manually if you want to use it. In Debian-based Linux, it's at
/usr/share/kicad/library/pspice.lib. - I am developing (very slowly) my own library of components based on the above with some changes and additions.
Configuring a project
- Create a new project in the conventional way.
- Open Eeschema and remove all the library references included by default.
- Manually add one or more libraries with SPICE components to the project.
- Note that the SPICE library that comes packaged with KiCad is not included by default in new KiCad projects.
- Specify the SPICE engine you want to use:
- Click the “Generate netlist” button (or the equivalent menu item).
- Select the “Spice” tab
- Enter the name of the command to invoke the simulator (with or without path) in the “Simulator command:” textbox.
Making it happen
- Do your schematic capture, subject to a couple best practices:
- For named nets, use global labels instead of local labels.
- The reason for this is that in the netlists, global identifiers will be used as-is but local labels get text prepended to the name—which makes it hard for you to remember/guess what the full identifier is.
- Use the “
0” component from a SPICE component library rather than theGNDsymbol.- “
0” is the official name of ground node in SPICE. Some engines may translateGNDinto0, some may not.
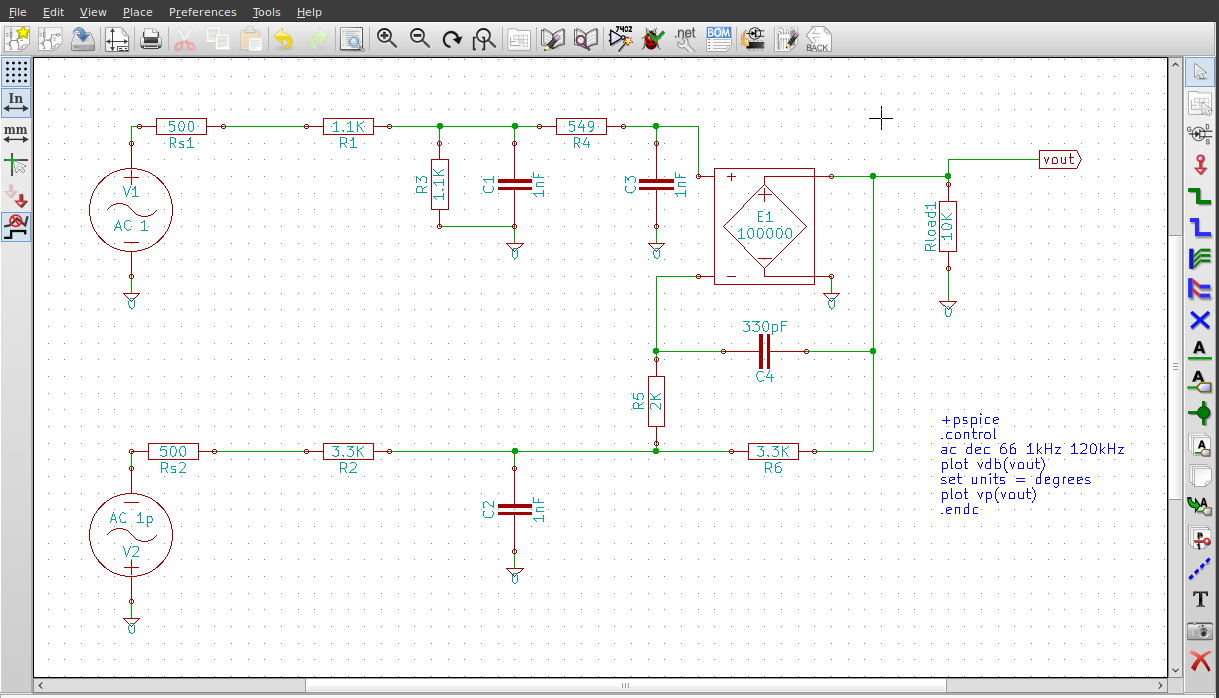
- To specify the simulations you want to run and the output you want to display, add a text block (i.e., “comment”) with the needed SPICE and Nutmeg syntax plus a little added mojo. The following does an AC analysis and plots the response at node
vout:+PSPICE .control ac dec 66 1kHz 120kHz plot vdb(vout) set units = degrees plot vp(vout) .endc
- The line
+PSPICEis KiCad-speak for, “Stick the following text at the end of a SPICE netlist.” There appears to be a bug in the parser that requires you to add a space after
 +PSPICEand before the line break.
- There is a corresponding
-PSPICEthat is KiCad-speak for, “Stick the following text at the start of a SPICE netlist.” - If you don't like seeing references to PSpice in your designs, you can use
+GNUCAPand-GNUCAPinstead. I believe they are exact synonyms in this context, but I am not certain. - Yes, this means you need to learn some SPICE and Nutmeg syntax. It's not hard.
- Run the simulation:
- Click the “Generate netlist” button (or the equivalent menu item).
- Select the “Spice” tab, and make sure “Default format” is checked. (You should only have to do this once; it will just save you time in subsequent invocations of the dialog.)
- Click the “Run simulator” button.